by WorldWin Coder Pvt Ltd | Nov 9, 2023 | blog, WordPress
WordPress, the powerhouse of website creation, offers an extensive array of plugins that serve as the backbone of customization and functionality. These WordPress plugin services elevate the user experience, enabling website owners to add features, streamline operations, and enhance their online presence. In this article, we’ll explore the significance of WordPress plugins, highlighting some essential services that can transform your website into a dynamic, efficient, and engaging platform.
Importance of WordPress Plugins
WordPress plugins are like the Swiss Army knife for website functionality. They extend the core features of WordPress and cater to diverse needs, allowing users to add new functionalities without complex coding. From SEO optimization and security enhancements to e-commerce solutions and performance improvements, these plugins play a pivotal role in tailoring your website to your specific requirements.
Essential WordPress Plugin Services
1. SEO Optimization Plugins
Search Engine Optimization (SEO) is crucial for a website’s visibility. WordPress offers a range of plugins like Yoast SEO and Rank Math that optimize content, meta descriptions, and improve site structure, helping you rank higher on search engine result pages.
2. Security Plugins
Protecting your website from cyber threats is paramount. Security plugins such as Wordfence and Sucuri offer features like firewall protection, malware scanning, and login security, ensuring a robust defense against potential attacks.
3. Performance Enhancement Plugins
Website speed and performance are critical for user experience. Plugins like WP Rocket and W3 Total Cache help in caching, minification, and content delivery network (CDN) integration, significantly improving site speed.
4. E-commerce Plugins
For online stores, WooCommerce stands out as a powerful plugin, offering a wide range of e-commerce functionalities. It enables easy product management, secure payment gateways, and a user-friendly shopping experience.
5. Contact Form Plugins
Engaging with your audience is simplified with contact form plugins like WPForms and Contact Form 7, enabling easy creation and management of forms for inquiries, feedback, or subscriptions.
Choosing the Right WordPress Plugin Services
While the WordPress plugin repository is vast, selecting the right plugins requires careful consideration. Here are some factors to consider:
- Reputation: Check reviews, ratings, and the number of active installations.
- Compatibility: Ensure the plugin is compatible with your WordPress version.
- Updates and Support: Look for plugins that receive regular updates and have responsive support.
Conclusion
WordPress plugin services are instrumental in optimizing, securing, and expanding the functionalities of your website. Understanding your specific needs and selecting the right plugins can transform your site, elevating it to new heights in user experience and performance. By leveraging these essential WordPress plugin services, you can streamline operations, enhance security, and provide an engaging digital experience for your visitors. Keep exploring the diverse world of WordPress plugins to unlock the full potential of your website!
by WorldWin Coder Pvt Ltd | Nov 6, 2023 | blog, WordPress
WordPress login hooks play a pivotal role in enhancing the functionality and security of your website. Understanding and leveraging these hooks can significantly impact your site’s performance. This comprehensive guide will delve into the world of WordPress login hook, shedding light on their importance and practical implementation.
WordPress, as a powerful content management system, offers a multitude of features and functionalities. Understanding its hooks system, especially the ones related to user logins, is crucial for site owners and developers.
What are WordPress Login Hooks?
WordPress login hooks are predefined actions or filters that allow developers to execute custom code at specific points during the login process. These hooks present opportunities to modify or extend default login behavior, ensuring a more personalized and secure login experience for users.
Importance of WordPress Login Hooks:
- Enhanced Security: Implementing custom code through login hook fortifies security measures. Actions like monitoring login attempts, enforcing two-factor authentication, or blocking suspicious IP addresses can be integrated using these hooks.
- User Experience Enhancement: Customizing the login process can create a more seamless and branded experience for users. You can personalize messages, redirect users after login, or modify login forms, elevating the overall user experience.
Practical Implementation:
- Customizing Login Messages: Use the
login_message filter to display custom messages on the login screen. This could be a welcome note or instructions for users.
- Redirect After Login: Alter the default redirection after login using the
login_redirect filter. Send users to specific pages based on their role or other criteria.
- Login Form Modification: Adjust the appearance and fields of the login form using the
login_form action. This could include adding additional fields or altering existing ones.
Examples of WordPress Login Hooks in Action:
Custom Login Message:
function custom_login_message() {

return "Welcome to Our WordPress Site! Login to access exclusive content.";

}

add_filter('login_message', 'custom_login_message');
Redirect After Login:
function custom_login_redirect($redirect_to, $request, $user) {

// Modify redirection logic here

return home_url('/dashboard');

}

add_filter('login_redirect', 'custom_login_redirect', 10, 3);
Conclusion:
WordPress login hooks are powerful tools that empower developers to tailor the login process according to specific needs. By understanding and utilizing these hooks effectively, one can significantly enhance security measures, personalize user experiences, and streamline site functionality.
In conclusion, mastering WordPress login hook is essential for anyone seeking to optimize their website’s login system and overall user experience. Incorporating custom functionalities through these hooks not only enhances security but also adds a layer of personalization, setting your website apart in a competitive online landscape.
by WorldWin Coder Pvt Ltd | Nov 3, 2023 | blog, WordPress
WordPress is a powerful and versatile content management system that powers over 40% of websites on the internet. While it’s known for its reliability, you might still encounter issues or need to repair your WordPress site at some point. Whether it’s a white screen of death, broken plugins, or a hacked website, knowing how to troubleshoot and repair WordPress is essential. In this guide, we’ll explore common issues and provide tips on how to repair your WordPress website.
1. Diagnosing the Problem
The first step in repairing your WordPress site is identifying the problem. Common issues include:
- White Screen of Death: When your website displays a blank white screen with no error message.
- Plugin or Theme Conflicts: Issues arising from incompatible plugins or themes.
- Database Connection Errors: Problems connecting to your site’s database.
- Hacking and Security Breaches: Unauthorized access or malware infections.
2. Back Up Your Site
Before making any repairs, always back up your WordPress site. Use a reliable backup plugin or your web hosting’s backup service to ensure that you can restore your site if anything goes wrong during the repair process.
3. Fixing the White Screen of Death
The white screen of death can be caused by several factors. To fix it, try the following:
- Disable Plugins: Sometimes, a problematic plugin causes the white screen. Deactivate all plugins and reactivate them one by one to identify the culprit.
- Switch Themes: Change to a default WordPress theme like Twenty Twenty-One to rule out theme-related issues.
- Increase Memory Limit: Edit your
wp-config.php file to increase PHP memory limits.
4. Resolving Plugin or Theme Conflicts
To repair issues related to plugins or themes, follow these steps:
- Disable Plugins: Deactivate all plugins and reactivate them one by one, checking for issues after each activation.
- Update Themes and Plugins: Ensure your themes and plugins are up to date, as outdated software can lead to compatibility problems.
- Check for Conflicts: Use a plugin like Health Check & Troubleshooting to identify conflicts and isolate them.
5. Fixing Database Connection Errors
Database connection errors can be resolved by checking your database configuration in wp-config.php. Make sure your database credentials are correct and up to date. If you’re not sure, contact your hosting provider for assistance.
6. Dealing with Hacking and Security Breaches
If you suspect your WordPress site has been hacked, take these actions:
- Change Passwords: Update your WordPress and hosting account passwords.
- Scan for Malware: Use security plugins like Wordfence or Sucuri to scan and remove malware.
- Restore from Backup: If the damage is extensive, consider restoring your site from a clean backup.
7. Regular Maintenance and Security
Prevention is key to avoiding future issues. Implement these best practices to keep your WordPress site healthy:
- Regular Updates: Keep your WordPress core, themes, and plugins up to date.
- Security Plugins: Install a reputable security plugin to monitor and protect your site.
- Strong Passwords: Use complex passwords and two-factor authentication.
- Backups: Regularly back up your website to ensure data safety.
Conclusion
Repairing WordPress doesn’t have to be daunting. With the right tools and knowledge, you can address common issues and maintain a secure and functional website. Remember to back up your site, diagnose the problem, and follow best practices for preventing future issues. WordPress offers a vibrant community and extensive resources, so don’t hesitate to seek help or advice if you run into complex problems. Your website will be up and running smoothly in no time.
by WorldWin Coder Pvt Ltd | Nov 1, 2023 | blog, WordPress
In the realm of education, establishing a strong online presence has become an essential element for academic institutions, educators, and learners. WordPress, renowned for its versatility and adaptability, has emerged as a powerhouse not only for blogs but also as an exceptional education website builder. In this comprehensive guide, we will explore the capabilities, advantages, and step-by-step insights into leveraging WordPress as an education-focused website builder, empowering educators and institutions to create engaging and functional online platforms.
Unveiling WordPress as an Education Website Builder
WordPress, originally recognized as a blogging platform, has evolved into a full-fledged content management system (CMS) offering a myriad of themes, plugins, and customization options, making it an ideal choice for creating educational websites. Its user-friendly interface, vast community support, and scalability make it an attractive option for educators aiming to establish a digital presence.
Advantages of Using WordPress for Educational Websites
- Ease of Use: Its intuitive interface allows educators with little to no technical background to create and manage a website effortlessly.
- Customization: Access to a plethora of education-specific themes and plugins that cater to various needs, from schools to e-learning platforms.
- Scalability: WordPress grows with your institution or personal educational endeavors, offering the flexibility to expand and adapt as needed.
- Community Support: Benefit from a vast community of developers and users, providing support and a wealth of resources.
- Cost-Effectiveness: WordPress is open-source, reducing initial investment costs while offering powerful features.
Using WordPress for Education: Steps to Get Started
Step 1: Setting Up WordPress
- Choose a reliable hosting service and install WordPress.
- Select a domain name relevant to your educational institution or purpose.
Step 2: Choosing Education-Centric Themes and Plugins
- Explore and install themes specifically designed for educational purposes (e.g., school, university, e-learning).
- Incorporate essential plugins for education, such as learning management systems, student management, and communication tools.
Step 3: Content Creation and Management
- Create informative, engaging content, including courses, schedules, blogs, and resources.
- Organize and manage content effectively using categories and tags.
Step 4: Design and Customization
- Customize the website’s appearance to align with your institution’s branding and style.
- Ensure mobile responsiveness for a seamless user experience.
Step 5: Engaging Features and Functionality
- Implement interactive features like forums, quizzes, and discussion boards for student engagement.
- Integrate assessment tools or grading systems as per your educational requirements.
Best Practices for WordPress-Powered Education Websites
- Clear Navigation: Ensure easy access to essential information and resources.
- Rich Multimedia Content: Incorporate images, videos, and interactive elements for an engaging experience.
- Consistent Updates: Regularly update content and maintain the site to keep it relevant and valuable.
- User Engagement: Encourage interaction through comments, forums, and student involvement.
Conclusion
WordPress stands as a formidable ally for educators and educational institutions seeking to establish a robust and engaging online presence. With its user-friendly nature, extensive customization options, and community support, it remains a top choice for building education-centric websites.
Embark on your WordPress journey and craft an immersive, functional, and informative online space for your educational endeavors. Whether it’s a school website, e-learning platform, or a personal education blog, WordPress stands ready to empower your digital presence in the education sphere.
by WorldWin Coder Pvt Ltd | Oct 30, 2023 | blog, WordPress
In today’s digital age, technology has transformed the way we teach and learn. Educational institutions are leveraging online platforms to deliver engaging and effective learning experiences. Among the various tools available, WordPress stands out as a versatile and powerful platform for educators. In this article, we’ll explore how WordPress for education can be harnessed for educational purposes and why it’s an invaluable asset for teachers, students, and institutions.
The Digital Revolution in Education
The educational landscape has evolved significantly over the years, with a growing emphasis on digital learning. This transformation has been accelerated by the ongoing global shift towards online education, driven by factors such as accessibility, flexibility, and the need for remote learning options. WordPress, a popular content management system originally designed for blogging, has adapted to these changing needs and emerged as an essential resource for the education sector.
What Is WordPress?
Before we delve into the educational applications, let’s briefly introduce WordPress. WordPress is an open-source platform that allows users to create and manage websites and blogs with ease. Its user-friendly interface, extensive customization options, and a vast library of plugins and themes make it a powerful tool for creating and maintaining web content.
The Educational Potential of WordPress
1. Creating Educational Websites
WordPress provides a straightforward way to design and develop educational websites. Whether you’re an individual teacher, a school, or a university, you can use WordPress to establish a professional online presence. Customizable themes and templates allow you to create a unique and engaging platform to showcase your courses, resources, and announcements.
2. Managing Content Effectively
Educators can use WordPress to publish and organize educational content. From lesson plans and lecture notes to multimedia presentations and assignments, WordPress simplifies content management. Its intuitive editor ensures that even those without advanced technical skills can create and update content effortlessly.
3. Interactive Learning
WordPress offers plugins and tools that can transform your educational website into an interactive hub. You can integrate discussion forums, quizzes, and collaboration tools to foster student engagement and facilitate effective communication.
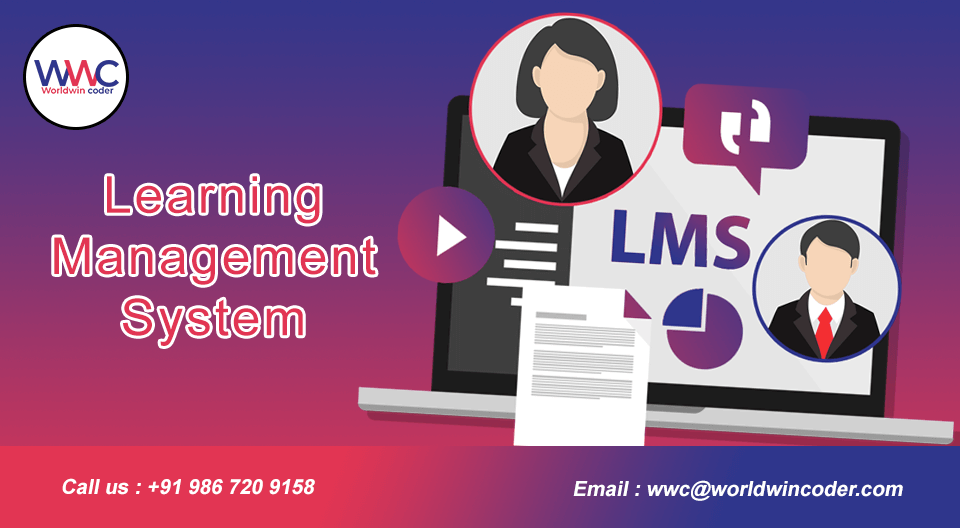
4. Learning Management Systems (LMS)
One of the most significant advantages of WordPress for education is its compatibility with Learning Management Systems (LMS) plugins. These LMS plugins, such as LearnDash and LifterLMS, enable you to create and manage online courses, track student progress, and offer a seamless learning experience.
5. Blogging for Education
WordPress’s blogging capabilities can be a valuable asset in the educational sphere. Teachers and students can use blogs to share insights, reflections, and assignments. This encourages critical thinking, communication skills, and the development of an online presence for students.
Success Stories and Case Studies
Numerous educational institutions and teachers have already reaped the benefits of WordPress. From university websites and school portals to individual educator blogs, there are many inspiring success stories that showcase how WordPress has transformed education. Highlighting these case studies can provide concrete examples of the platform’s effectiveness in different educational contexts.
The Future of WordPress in Education
As technology continues to advance, the role of WordPress in education is likely to expand. The integration of AI, augmented reality, and virtual reality into educational websites is on the horizon, and WordPress is well-equipped to adapt to these innovations.
Conclusion
In conclusion, WordPress is a versatile and dynamic platform that can revolutionize the way we teach and learn. Its user-friendliness, adaptability, and extensive library of resources make it an indispensable tool for educators. Whether you’re an individual teacher looking to create a personal teaching platform or an educational institution aiming to enhance the online learning experience, WordPress for education is a powerful choice that can drive engagement, collaboration, and innovation in the field of learning. Embrace the digital revolution in education with WordPress and unlock the full potential of online teaching and learning.